Most people know their living room is not working. The light is flat, the TV wall looks bare, the floor is tired and the furniture never quite sits right. What they do not know is where to start, who to call first and how to stop a makeover turning into a string of disagreements between contractors.
That is where a design partner changes the experience. With Suimas, you follow a clear path from first conversation to finished room. Here is that journey, step by step.
Step 1: Consultation and space assessment
We start by listening. How do you use the room? What annoys you about it today? What is your budget? Then we visit, measure, photograph and assess the space: ceiling height, natural light, wall condition, floor, power points and the position of the TV and seating.
You leave this step with a clear understanding of what the room needs, what is worth spending on and what can wait.
Step 2: 3D visualisation
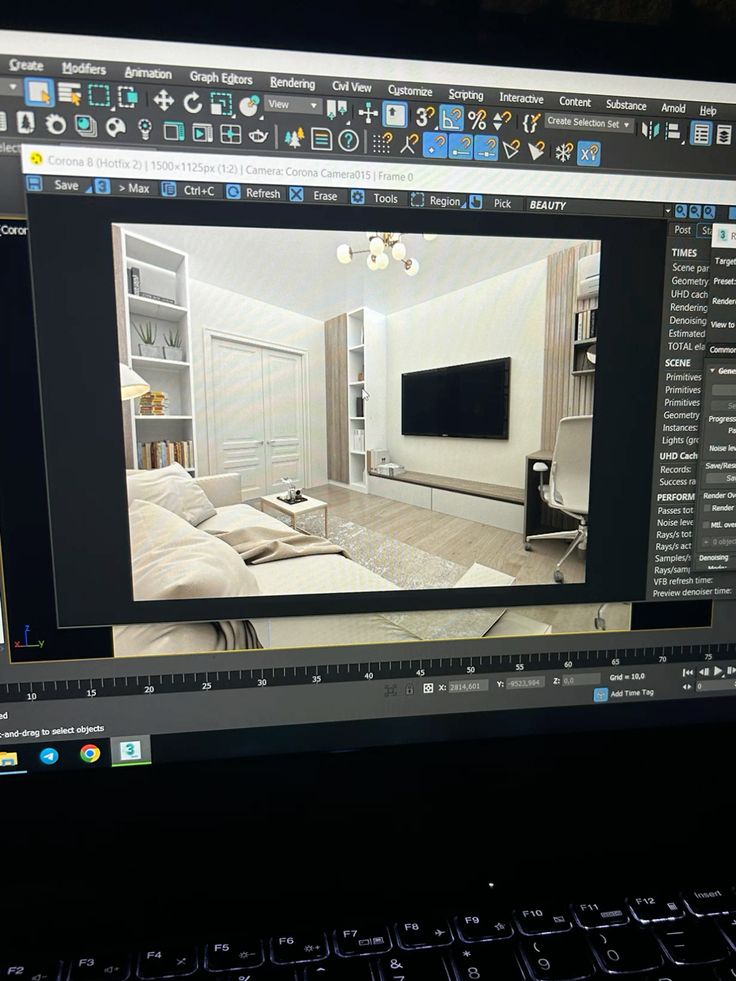
Before a single board goes up, you see your living room as it will look. A 3D visual shows the ceiling, lighting, feature wall, flooring and furniture together, so you can change colours, move things and test ideas on screen, where changes cost almost nothing. It also removes the guesswork: you approve a picture, not a promise. See 3D Interior Design Renders.
Step 3: The key upgrades
Every living room is different, but these six upgrades deliver the biggest change.
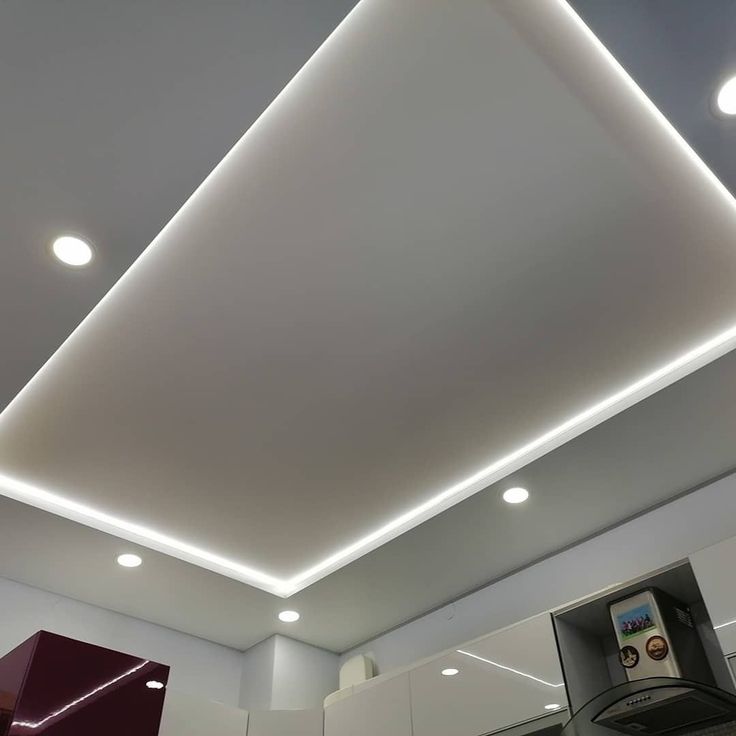
- Gypsum ceiling and lighting. The ceiling is the biggest unused surface in the room. A gypsum ceiling with cove lighting and carefully placed downlights changes how the whole room feels, and it hides wiring and cables. See Gypsum Ceilings & Integrated Lighting and Best Ceiling Types for Living Areas.
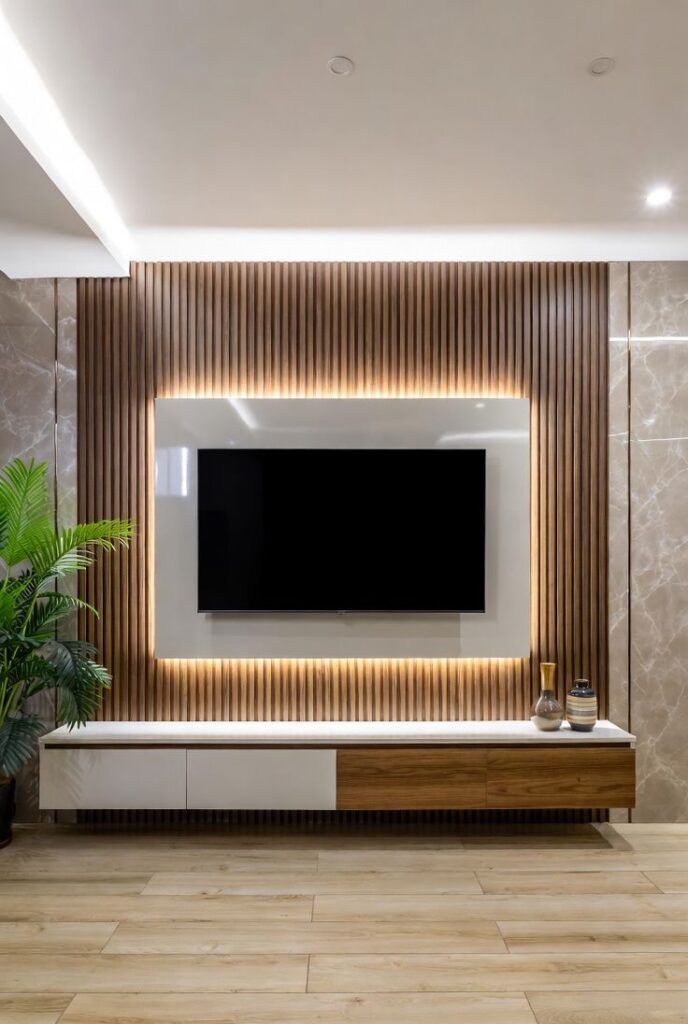
2. Fluted or feature walls. A fluted panel wall, lit from above or behind, gives the room a focal point. Our guide Combining Fluted Panels with Lighting explains how, and our Fluted Panels & Wainscoting service delivers it.
3. Flooring. New flooring lifts the entire room. Options include porcelain tile, SPC and wood-effect vinyl, chosen for how you live. See Floor Installation Services.
4. TV unit. A built-in or custom TV unit, with hidden cables and storage, makes the room look finished. See Modern TV Unit Designs.
5. Colour scheme. Colour ties everything together. We choose a palette that works with your lighting, flooring and furniture, not against them. See Painting & Special Effect Finishes.
6. Furniture layout. Where the sofa, chairs, tables and rugs go decides how the room feels to live in. We plan circulation, conversation areas and the line of sight to the TV, so the room works as well as it looks.
You do not have to do everything at once. Many clients start with the ceiling and lighting, which makes the biggest difference, and add the feature wall, flooring and furniture in stages.
Step 4: Installation and styling
Once you approve the design, we run the work. One team coordinates the trades in the right order, with the wiring planned before the ceiling and the panels, and the flooring last. You get a clear programme, regular updates and a final walk-through to check every detail.
Then comes the part that makes the room feel like yours: styling. Cushions, lamps, art, plants and accessories are placed to complete the look, so the room feels finished on the day you walk in.
Why a partner makes the difference
- One team, one plan. No separate contractors blaming each other.
- You see it first. 3D visuals mean no surprises.
- Coordinated work. Ceiling, lighting, walls and flooring are planned together.
- Clear scope and budget. You know what is being done and what it costs.
- Honest advice. We tell you where to spend and where to save.
Budget and phasing: you do not have to do it all at once
A full living room transformation can be staged to suit your budget. A sensible order is to start with the work that sits behind the finished surfaces, since it is the hardest to change later: ceiling, wiring and lighting first. Then add the feature wall and TV unit, then flooring, and finish with colour, furniture and styling. As a guide, a ceiling and lighting upgrade for a typical living room falls in the 400KSH – 600K band, with a full transformation above that depending on the finishes you choose. Because the 3D visual shows the whole plan from day one, every stage you add later still fits the design, so the room never looks like a patchwork of separate decisions.
Start your living room transformation
Call us for a site visit or Send us photos and measurements of your living room, and we will arrange a consultation.
Call or WhatsApp 0717 044 443. Free consultations across Nairobi and all 47 counties.
Related Post Resources
- Full House Interior Design
- Residential Interior Design
- Bedroom Interior Design
- Kitchen Cabinets, Wardrobes & Joinery
- Renovation Services
- Vinyl Flooring Installation
- Wall Cladding & Wainscoting Installation
- Ceiling Types for Living Rooms Compared
- Planning Home Ceiling Lighting
- Fluted Panels vs Marble Sheets
- Best Flooring for Kenyan Homes
- Modern Apartment Interior Designers in Kenya
- Interior Design and Property Value Kenya – ROI
- Apartment Contractors in Kenya – Suimas
- Suimas Interior Design Services
