A beautiful room with bad lighting looks flat. A modest room with good lighting looks expensive. The difference is almost never the fittings themselves. It is the plan: where the light comes from, how many layers there are, how warm it is and whether you can dim it.
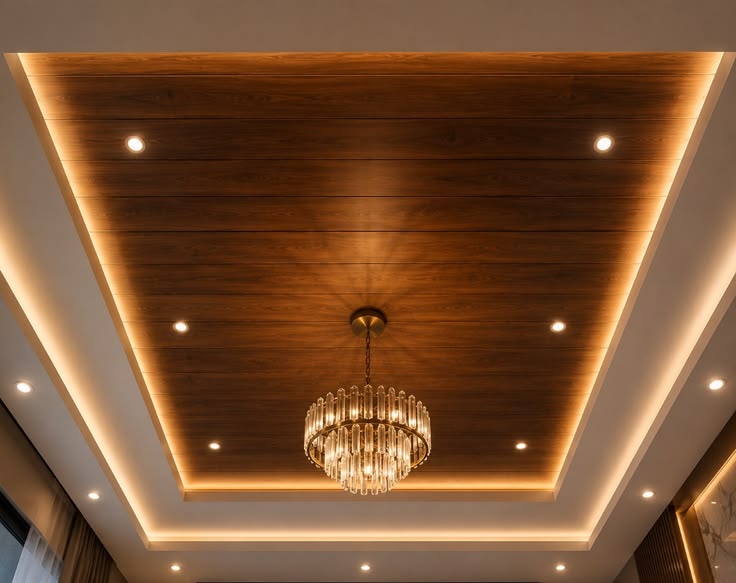
This guide shows you how to plan home ceiling lighting properly. It covers the three main ceiling lighting types (cove, recessed and feature), how to combine them, the technical choices that matter (colour temperature, dimming, drivers, switching) and how to approach each room. Plan it before the ceiling is built, because the wiring and the ceiling shape both depend on it.
Start with layers, not fittings
Good lighting uses several layers, each doing a different job:
| Layer | Purpose | Typical sources |
|---|---|---|
| Ambient | General, soft, overall light | Cove lighting, evenly spaced downlights |
| Task | Bright light where you read, cook, work | Under-cabinet strips, desk lamps, adjustable spots |
| Accent | Highlights art, textures, feature walls | Wall washers, picture lights, spotlights |
| Decorative | Adds character and sparkle | Pendants, chandeliers, sculptural fittings |
A room lit by a single layer (usually a grid of downlights) feels harsh and flat. A room lit by two or three layers feels warm and layered. When you plan the ceiling, think first about which layers you want, then choose the fittings to deliver them.
The three main ceiling lighting options
1. Cove lighting
What it is: An LED strip hidden in a recess around the edge of the ceiling, washing light up and across the ceiling surface. The ceiling becomes a soft, glowing reflector.
Strengths:
- Gentle, glare-free ambient light
- Makes ceilings feel higher
- Flatters people and materials
- Excellent for evening TV viewing
Watch out for:
- Geometry. The strip needs enough distance from the ceiling face for the light to blend before it lands, and the lip of the cove must hide the strip from every seating position. Get it wrong and you see dotted hot spots. We explain more in gypsum ceiling lighting mistakes.
- Strip quality. Higher-density strips in an aluminium channel with a diffuser give a smoother line and better heat control.
- Access. Drivers should be positioned where they can be reached.
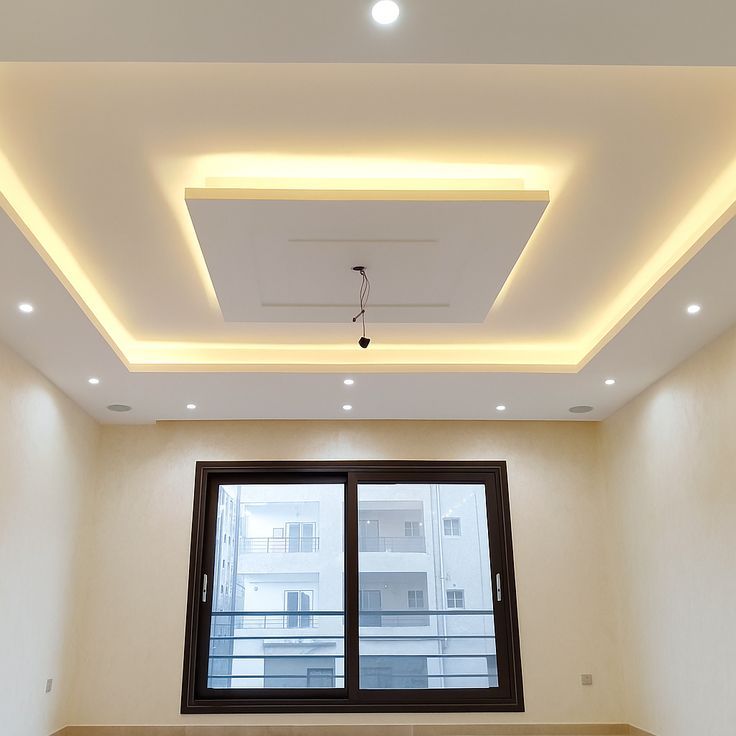
Best for: living rooms, bedrooms, dining areas, corridors, any room with a gypsum ceiling. See Living Room Interior Design and Bedroom Interior Design.
2. Recessed lighting (downlights)
What it is: Fittings set into the ceiling so the light source sits flush or slightly recessed. They come in fixed and adjustable versions, with different beam angles.
Strengths:
- Clean, minimal look
- Useful for task and general light
- Adjustable versions can highlight art or walls
Watch out for:
- The “airport grid.” Evenly spaced lights across the whole ceiling create glare and a clinical feel. Place downlights with purpose: along the edges to wash walls, over task areas and at circulation points.
- Glare. Fittings directly above a sofa headrest or bed head, or in the line of sight to a TV, cause discomfort.
- Spacing. As a rule of thumb, downlights in standard-height rooms are often spaced somewhere between 1.2 m and 1.8 m apart, but the right spacing depends on beam angle, ceiling height and how bright you want the room.
- Beam angle. Narrower beams highlight, wider beams spread. Mix as needed.
- Heat and fitting quality. Cheap fittings can overheat and fail early.
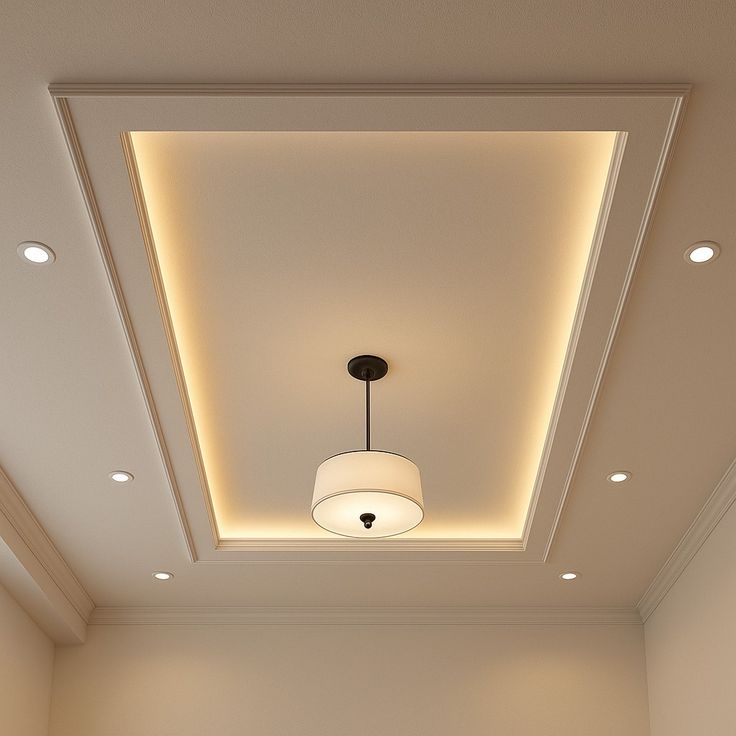
Best for: kitchens, corridors, bathrooms, task areas and as a complement to cove lighting in living spaces.
3. Feature lighting (pendants, chandeliers, linear and sculptural lights)
What it is: Visible fittings that act as design pieces: pendants over a dining table, a chandelier in a double-height space, a long linear light over an island.
Strengths:
- Adds personality and a focal point
- Defines zones in open-plan spaces
- Gives the decorative layer
Watch out for:
- Height. A pendant over a dining table typically hangs around 75 to 90 cm above the tabletop, though this varies with the fitting and the ceiling height.
- Scale. Too small and it looks lost, too big and it dominates.
- Support. Heavy fittings need a proper fixing point in the slab or reinforced frame, planned before the ceiling is built.
- Wiring. The feature light’s position must be decided before boarding.
Best for: dining areas, double-height spaces, entrances, kitchen islands. See Ceiling Types for Living Rooms Compared for how feature lighting pairs with different ceiling shapes.
Choosing colour temperature
Colour temperature is measured in kelvin (K). Lower is warmer, higher is cooler.
| Room | Common choice |
|---|---|
| Living room, bedroom, dining | Warm white, around 2700K to 3000K |
| Kitchen | Neutral-warm, around 3000K to 4000K |
| Home office or study | Neutral white, around 3500K to 4000K |
| Bathroom | Neutral, around 3000K to 4000K |
| Corridors and stairs | Warm to neutral, matching adjacent rooms |
Rule: do not mix different colour temperatures within one room or open-plan area. The mismatch is obvious and looks like an error. Choose one temperature for each connected space.
Colour quality (CRI)
Colour rendering index describes how accurately a light shows colours. Cheap LEDs can make skin tones, food and wood look dull or green. Where colour matters (living areas, kitchens, dressing areas), look for fittings with good colour rendering, commonly 90 or above.
Dimming and control
Dimming is the single most useful upgrade you can make. The same room can be bright for cleaning and soft for the evening.
- Specify dimmable drivers from the start. They cost slightly more at purchase, and cannot be added later without replacing the drivers.
- Match the driver and the dimmer. Different dimming systems exist, and a mismatch causes flicker or poor range.
- Separate circuits for separate layers. Put cove, downlights and feature lights on different switches or dimmer channels so you can combine them.
- Consider scenes. Smart switching can store settings such as “evening” or “movie.” It is optional but increasingly popular, and worth planning wiring for even if you start with simple switches.
Drivers and wiring: the part nobody sees
LED lighting runs on drivers (power supplies) that sit above the ceiling. They are the most common point of failure, so:
- Place drivers where they can be reached through an access panel.
- Make sure they have enough ventilation and are not buried in insulation.
- Label each driver and circuit.
- Leave spare cable at light positions.
- Consider surge protection, since LED drivers can be sensitive to voltage fluctuations.
This is why lighting must be planned before boarding. Our process article, Step-by-Step Ceiling Installation Process, shows where the wiring and the ceiling stages meet.
Room-by-room planning
Living room
Combine cove lighting for ambient light, a few well-placed downlights, a feature pendant or floor lamps for accent, and wall washers if you want to light art or a feature wall. Keep downlights out of the line of sight to the TV, and think about glare on the screen. If you have a lit TV wall, make sure the ceiling light and the wall light do not fight each other. See Modern TV Unit Designs and our comparison of fluted panels vs marble sheets, which covers LED backlighting for TV walls.
Dining area
A pendant or linear fitting centred over the table, on its own dimmer. Soft cove or downlights for the surrounding space. Keep the dining light warm.
Kitchen
This is the room that needs the most task light. Use evenly placed downlights for general light and under-cabinet strips for worktops. Fittings should be easy to clean and, where near the cooker, suited to the heat and grease. See Kitchen Cabinets, Wardrobes & Joinery for how lighting integrates with cabinets. Commonly cited guidance for kitchen worktops is brighter light, in the range of 300 to 500 lux, though exact needs vary.
Bedrooms
Soft, dimmable cove or concealed lighting for ambience, bedside lamps or wall lights for reading, and a switch near the bed so you do not need to get up. Avoid downlights directly above the bed head, where they shine into your eyes when lying down.
Bathrooms
Fittings in wet zones need an appropriate IP rating (your electrician will confirm what each zone requires). Use even light at the mirror, ideally from the sides or around the mirror rather than from directly above, to avoid shadows on the face. Ventilation matters for the ceiling too.
Corridors and staircases
Low-level or linear lighting that is gentle, safe and glare-free. Consider motion sensors for night use.
Planning your switching
Draw up a switching plan before wiring. Decide:
- How many zones each room has.
- Which circuits are dimmable.
- Where two-way and three-way switches are needed (rooms with two doors, long corridors).
- Where spare points for future fittings should go.
A little extra planning here avoids a bank of confusing switches by the door.
Budget: where lighting money goes
A basic scheme (downlights only) is the most economical. A mid-level scheme (cove plus downlights) gives the best value for money. A premium scheme adds layered lighting, feature fittings, quality drivers and smart control. As a guide, lighting for a typical living room falls in the [insert range] band, depending on fittings and control. It is usually priced separately from the ceiling itself. See Gypsum Ceiling Cost in Nairobi for how ceiling and lighting costs are broken down.
Common mistakes
- Planning lighting after the ceiling is built.
- A single layer of downlights across the whole ceiling.
- Mixing colour temperatures within a room.
- No dimming.
- Cove strips too close to the ceiling face, showing hot spots.
- Downlights over bed heads and in TV sightlines.
- Heavy pendants without a proper fixing point.
- No access to drivers.
- Ignoring the relationship between ceiling lighting and wall lighting.
See it before you build it
A 3D render lets you see how cove, recessed and feature lighting work together in your actual room. See 3D Interior Design Renders. We plan ceilings and lighting together as one design with our Gypsum Ceilings & Integrated Lighting service. To choose the ceiling shape that suits your lighting plan, read Best Ceiling Types for Living Areas.
Call or WhatsApp 0717 044 443 for a site visit across Nairobi, Kisumu, Eldoret, Mombasa, Nakuru, Kilifi and all acroos Kenya and East Africa.
Related Post Resources
- Full House Interior Design
- Residential Interior Design
- Bathroom Interior Designs
- Fluted Panels & Wainscoting
- Painting & Special Effect Finishes
- Renovation Services
- Gypsum Board Ceilings: Pros, Cons and Best Applications
- Main Types of Ceilings Compared
- Step-by-Step Ceiling Installation Process
- Modern Apartment Interior Designers in Kenya
- Kitchen Renovation Ideas for Modern Kenyan Homes
- Future of Interior Design Kenya – Upcoming Trends
- Interior Design and Property Value Kenya – ROI
- Gypsum Ceiling Designs Portfolio
- Suimas Interior Design Services
